Write a device driver for Zephyr - Part 1
This is the first post in this series. See also part part2, part3 and part4.
Overview
The first time I came across Zephyr [1] was on Embedded Linux Conference in 2016. Once back from the conference I tried to install it on a Cortex-M EVK board I had on my desk. It did not go smoothly at all. The documentation was not very good back then and I don't think I ever got system up and running. That's where I left it.
Now, seven years Later, I'm going to give it another try. A friend of mine, Benjamin Börjesson, who is an active contributor to the project has inspired me to test it out once again.
So I took whatever I could find at home that could be used for an evaluation. What I found was :
- A Raspberry Pi Pico [2] to run Zephyr on
- A Segger J-Link [3] for programming and debugging
- A Digital-To-Analogue-Converter IC (ltc1665 [4]) that the Zephyr project did not support
Great! Our goal will be to write a driver for the DAC, test it out and contribute to the Zephyr project.
Zephyr
First a few words about Zephyr itself. Zephyr is a small Real-Time Operating System (RTOS) which became a hosted collaborative project for the Linux Foundation in 2016.
Zephyr targets small and cheap MCU:s with constrained resources rather than those bigger SoCs that usually runs Linux. It supports a wide range of architectures and has a extensive suite of kernel services that you can use in the application.
It offers a kernel with a small footprint and a flexible configuration build system. Every Linux kernel hacker will recognize itself in the filesystem structure, Kconfig and device trees - which felt good to me.
To me, it feels like a more modern and fresh alternative to FreeRTOS [5] which I'm quite familiar with already.
Besides, FreeRTOS uses the Hungarian notation [6], and just avoiding that is actually reason enough for me to choose Zephyr over FreeRTOS. I fully agree with the Linux kernel documentation [7]:
Encoding the type of a function into the name (so-called Hungarian` notation) is asinine - the compiler knows the types anyway and can check those, and it only confuses the programmer.
Even if I personally prefer the older version (before our Code-of-Conduct) [8] :
Encoding the type of a function into the name (so-called Hungarian notation) is brain damaged - the compiler knows the types anyway and can check those, and it only confuses the programmer. No wonder MicroSoft makes buggy programs.
Hardware setup
No fancy hardware setup. I did solder the LTC1665 chip on a break-out board and connected everything with jumper cables. The electrical interface for the LTC1665 is SPI.
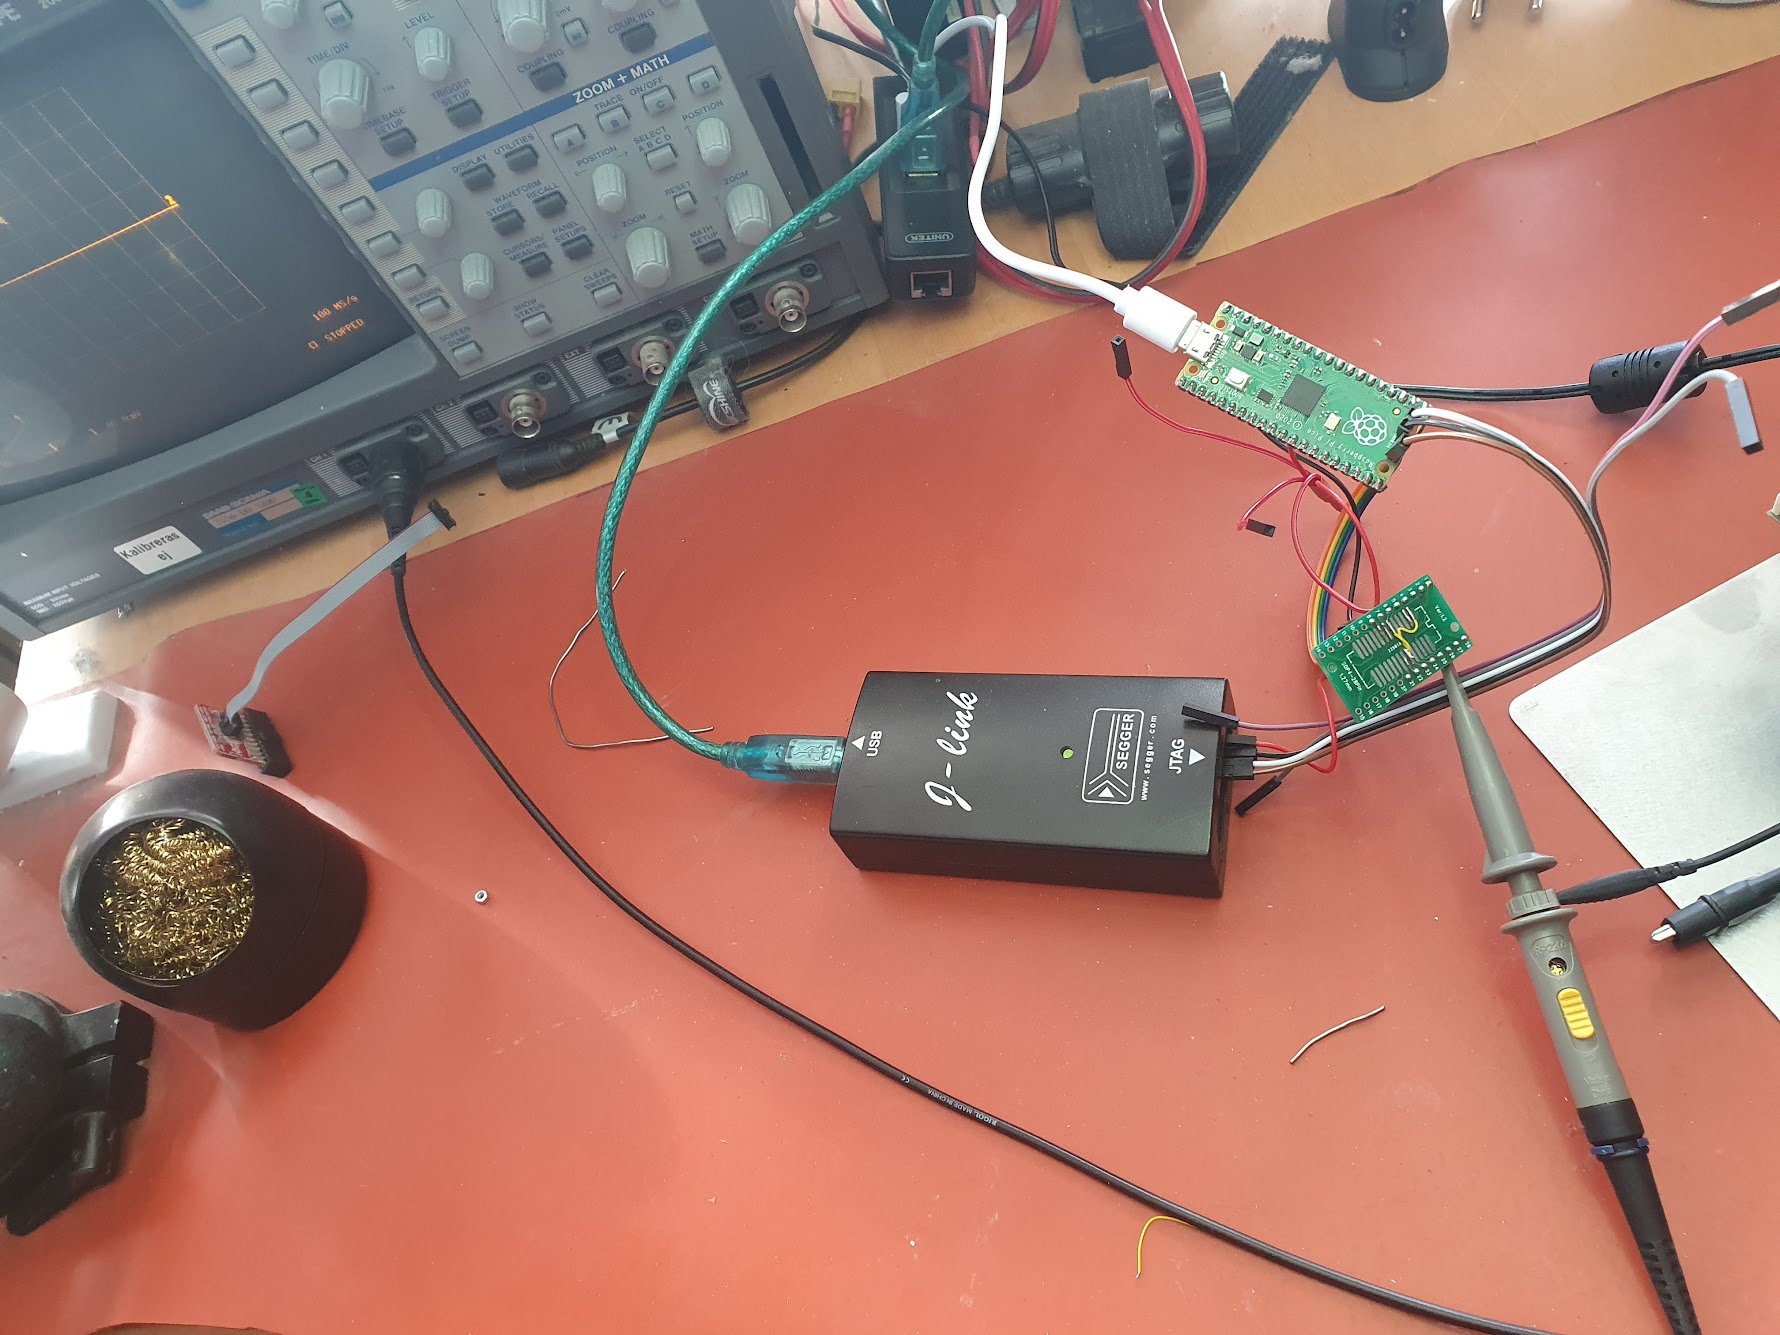
The connection between the Raspberry Pi Pico and the J-Link:
| Pin RP Pico | Pin J-Link | Signal | |
|---|---|---|---|
| "DEBUG SWCLKW | 9 | SWCLK | |
| "DEBUG GND" | 4 | GND | |
| "3V3" Pad 36 | 1 | VTref | |
The connection between Raspberry Pi Pico and LTC1665:
| Pin RP Pico | LTC1665 | Signal |
|---|---|---|
| "SPI0_RX" Pad 16 | DIN Pin 9 | SPI_RX |
| "SPI0_CSN" Pad 17 | CS Pin 7 | SPI_CS |
| "SPI0_SCK" Pad 18 | SCK pin 8 | SPI_SCK |
| "SPI0_TX" Pad 19 | DOUT Pin 10 | SPI_TX |
Software setup
Install Zephyr
Zephyr does use west [10] for pretty much everything. West is a meta tool used for repository management, building, debugging, deploying.. you name it. It has many similarities with bitbake that you will find in Yocto. I'm more of a "do one thing and do it well"-guy, so these tools (nor west or bitbake) makes a huge impression on me.
West is written in Python, as the nature of Python is as it's, you have to make a virtual environment to make sure that your setup will work for more than a week. Otherwise you will end up in incompatibilities as soon you upgrading some of the python dependencies.
The documentation [9] is actually really good nowadays. Most of these commands are just copy&paste from there.
Create a new virtual environment:
python -m venv ~/zephyrproject/.venv
Activate the virtual environment:
source ~/zephyrproject/.venv/bin/activate
Install west:
pip install west
Get the Zephyr source code:
west init ~/zephyrproject
cd ~/zephyrproject
west update
Export a Zephyr CMake package to allow CMake to automatically load boilerplate code required for building Zephyr applications:
west zephyr-export
The Zephyr project does contain a file with additional Python dependencies, install them:
pip install -r ~/zephyrproject/zephyr/scripts/requirements.txt
Install Zephyr SDK
The Zephyr Software Development Kit (SDK) contain toolchains for all architectures that is supported by Zephyr.
Download the latest SDK bundle:
cd ~
wget https://github.com/zephyrproject-rtos/sdk-ng/releases/download/v0.16.0/zephyr-sdk-0.16.0_linux-x86_64.tar.xz
wget -O - https://github.com/zephyrproject-rtos/sdk-ng/releases/download/v0.16.0/sha256.sum | shasum --check --ignore-missing
Extract the archive:
tar xvf zephyr-sdk-0.16.0_linux-x86_64.tar.xz
Run the setup script:
cd zephyr-sdk-0.16.0
./setup.sh
Build OpenOCD
The Raspberry Pi Pico has an SWD interface that can be used to program and debug the on board RP2040 MCU.
This interface can be utilized by OpenOCD. Support for RP2040 is not mainlined though, so we have to go for a rpi fork [11].
Clone repository:
git clone https://github.com/raspberrypi/openocd.git
cd openocd
Build:
./bootstrap
./configure
make
And install:
make install
Build sample application
The Raspberry Pi Pico does have a LED on board. So blinky, an application that will flash the LED with 1Hz, is a good test to prove that at least something is alive. Build it:
cd ~/zephyrproject/zephyr
west build -b rpi_pico samples/basic/blinky -- -DOPENOCD=/usr/local/bin/openocd -DOPENOCD_DEFAULT_PATH=/usr/local/share/openocd/scripts -DRPI_PICO_DEBUG_ADAPTER=jlink
Note that we specify the board (-b) to rpi_pico.
OPENOCD and OPENOCD_DEFAULT_PATH should point to where OpenOCD is installed in the previous step.
Flash the application
To flash our Raspberry Pi Pico, we just run:
west flash
As we have set the RPI_PICO_DEBUG_ADAPTER during the build stage, it's cached so it can be omitted from the west flash and west debug commands. Otherwise we had to provide the --runner option. E.g. :
west flash --runner jlink
You don't have to use a J-link to flash the Raspberry Pi Pico, you could also copy the UF2 file to target. If you power up the Pico with the BOOTSEL button pressed, it will appear on the host as a mass storage device where you could simply copy the UF2 file to. You loose the possibility to debug with GDB though.
Debug the application
The most straight forward way is to use west to start a GDB session (--runner is still cached from the build stage):
west debug
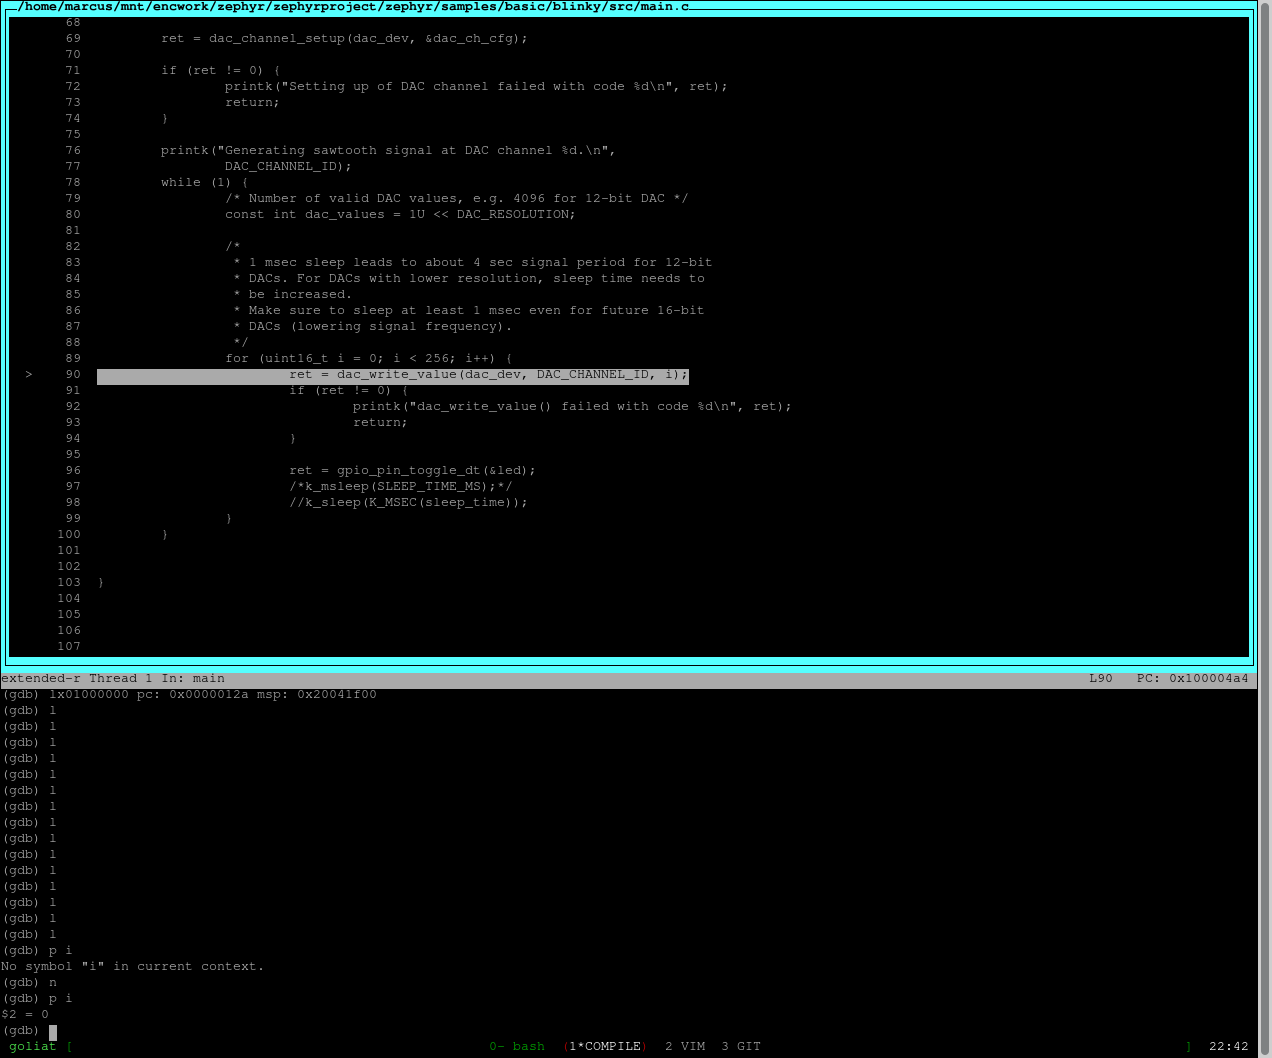
I prefer to use the Text User Interface (TUI) as it's easier to follow the code, both in C and assembler. Enter TUI mode by press CTRL+X+A or enter "tui enable" on the command line.
If you do not want to use west, you could start openocd by yourself:
openocd -f interface/jlink.cfg -c 'transport select swd' -f target/rp2040.cfg -c "adapter speed 2000" -c 'targets rp2040.core0'
And manually connect with GDB:
gdb-multiarch -tui
(gdb) target external :3333
(gdb) file ./build/zephyr/zephyr.elf
The result is the same.
Summary
Both the hardware and software environment is now ready to do some real work. In the part2 we will focus on how to integrate the driver into the Zephyr project.
References
| [1] | https://www.zephyrproject.org/ |
| [2] | https://www.raspberrypi.com/products/raspberry-pi-pico/ |
| [3] | https://https://www.segger.com/products/debug-probes/j-link/ |
| [4] | https://www.analog.com/media/en/technical-documentation/data-sheets/166560fa.pdf |
| [5] | https://www.freertos.org/ |
| [6] | https://en.wikipedia.org/wiki/Hungarian_notation |
| [7] | https://elixir.bootlin.com/linux/latest/source/Documentation/process/coding-style.rst#L324 |
| [8] | https://elixir.bootlin.com/linux/v3.10/source/Documentation/CodingStyle#L252 |
| [9] | https://docs.zephyrproject.org/latest/develop/getting_started/index.html |
| [10] | https://docs.zephyrproject.org/latest/develop/west/index.html#west |
| [11] | https://github.com/raspberrypi/openocd |