Making coffee difficult
Let's start this post with a video I found on Instagram [1]:
I found this video incredibly fun as it reminds me of my own discussions about coffee.
Me & Coffee
A bit of my history
I have been drinking coffee since even before I started elementary school. That's how it is growing up in a farming community; coffee and buns at 1PM for everyone. Then back to work for another 10 hours. Hats off to the farmers.
At that time, coffee was just a bitter, black liquid that I appreciated even as a kid. Time passes and somehow I grew up and became a teenager. Still drinking coffee of course. Copious amounts of it.
I was a bit of a night owl back then. I had started writing code and were not too rarely awake until around 4AM. Drinking coffee, writing code and listening to death metal was my cup of tea (pun intended). That was basically what my years in the middle and high school looked like.
Now I have two teenagers of my own, and they have not adopted my high school habits - which is a good thing.
So my first 20 years have been marked by a lot of coffee rather than good coffee.
How about now?
The last 15 years or so, I've started to care more about the coffee. There were small improvements here and there. Better brewer (Moccamaster), better coffee and so on. I bought my first coffee grinder around 2015, and that was a big step up. I started testing new brewing methods and experimenting with different grind sizes and brew ratios.
Even how much impact different coffee filters had on the cup became something I paid attention to. I started to understand that coffee is not just a bitter, black liquid, but a complex beverage with a lot of variables that can be tweaked.
Tweaking is fun.
Coffee beans
So let's start from the beginning.
Everything starts with the bean, or the seed to be precise. Everything downstream of it - grinding, brewing, extraction - can only make the best out of what you started with. A bad bean stays a bad bean no matter how fancy your equipment is. It is as simple as that.
I buy my green beans from Vista Gårdsrosteri [2], a small roastery just 30km from my home. They have a good selection of single origin beans.
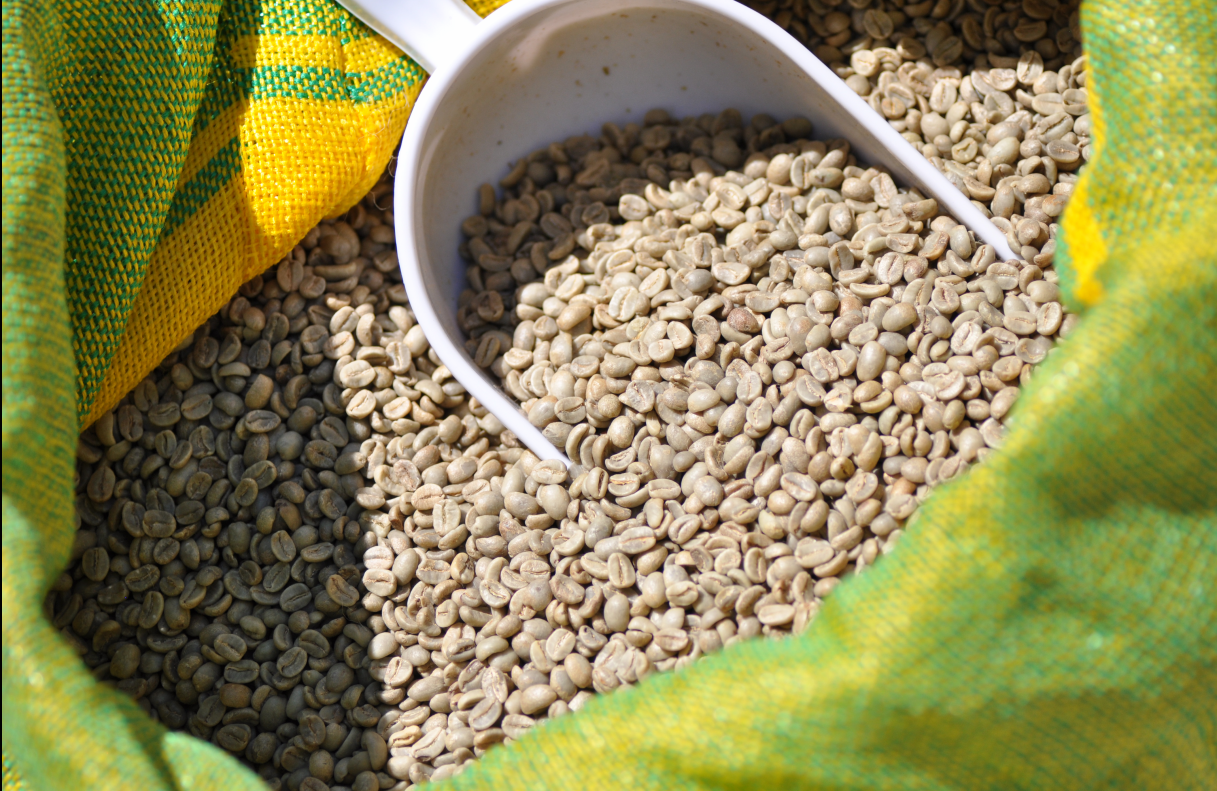
I usually buy 20-30kg of green beans at a time, which I then roast myself.
Until today, I have roasted nearly 500kg of coffee at home for the last 6 years. It may sound like a lot, but let's do some calculations:
- About 15% of the beans weight is lost during roasting, so 500kg of green beans gives me roughly 425kg of roasted coffee.
- One cup of coffee is roughly 250g water and 15g coffee, which means I have brewed roughly 28,000 cups of coffee at home in the last 6 years.
- That is roughly 4700 cups of coffee per year, or 13 cups per day.
- There are at least 3 coffee drinkers in the household, so that is roughly 4 cups per person per day.
- 4 cups per day is still a lot, but I have not counted in all cups of coffee I brew for guests, friends and family.
- That would take it down to roughly 3 cups per person per day, and that is probably a more realistic number.
Coffee origin
Coffee is mainly grown in a belt around the equator, roughly between the tropics of Cancer and Capricorn. Within that belt, altitude seems to be the variable that matters the most.
Higher up, the plant grows slower, and that gives the coffee cherry more time to build up sugar and acids before it is harvested. This is probably why high grown Arabica (roughly above 1200-1500 meters) tends to taste more complex and acidic than the same variety grown down at sea level.
I used to roast single origin coffees just to taste the difference between them, but I have since moved on to blends. When I had my period of beer-brewing-obsession a couple of years ago, I did the same to the hops. It is a good way to lean to taste the differenes.
My blend
I had a discussion with my local coffee roastery [2] and came up with my current blend. It consists of 40% Honduras, 40% Peru and 20% Brazil, so let's see what that combination is actually doing to the cup.
- Honduras tends to be medium bodied with mild acidity and notes of chocolate, caramel and nuts.
- Peru is grown high up in the Andes and tastes quite similar, mild and well balanced with low to medium acidity with some sweetness.
- Brazil, on the other hand, is mostly grown at lower altitude, which gives it a heavier body, low acidity and a nutty, chocolatey profile with almost no fruitiness at all.
At least that is the theory.
Roast level
Roasting is basically a controlled pyrolysis process, same principle as heat treating steel, just at a lower temperature and over minutes instead of hours.
Somewhere past 150-160 degrees Celsius, the Maillard reaction kicks in - the same thing that browns a steak - and produces most of the color and aroma. Around 175-205 degrees the sugars start caramelizing too, adding more of both.
At roughly 196 degrees the bean reaches "first crack", an audible pop from the steam and CO2 built up inside, a bit like popcorn. Most light roasts stop around here.
Push it further towards "second crack" (around 224 degrees) and the bean's structure starts breaking down, oils get pushed to the surface, and you get the dark, shiny, smoky roast a lot of people (wrongly, in my opinion) think of as "strong" coffee.
The acids that give a coffee its brightness break down more the longer and hotter you roast, which is exactly why a light roast tastes sharper and a dark roast tastes flatter and more bitter. I prefer a lighter roast for my filter coffee for that reason, it lets the bean's actual origin speak instead of just tasting like burnt bean.
You will barely notice the difference between different origins in a dark roast; everything tastes the same.
Home roasting
I started out roasting green beans in the kitchen oven, which works, at least technically.
The oven has no real airflow and heats mostly from the outside in, so getting an even roast meant constantly pulling out the tray and shaking the beans around, while guessing the internal bean temperature from smell and the color of the smoke coming out of the oven door. Needless to say, the batches were pretty inconsistent.
The roasts became very inconsistent from batch to batch, and even within the same batch as the oven has hot and cold spots. Also, as the beans lay flat on the tray, the contact with the hot metal surface means the bottom of the beans roasts faster than the top.
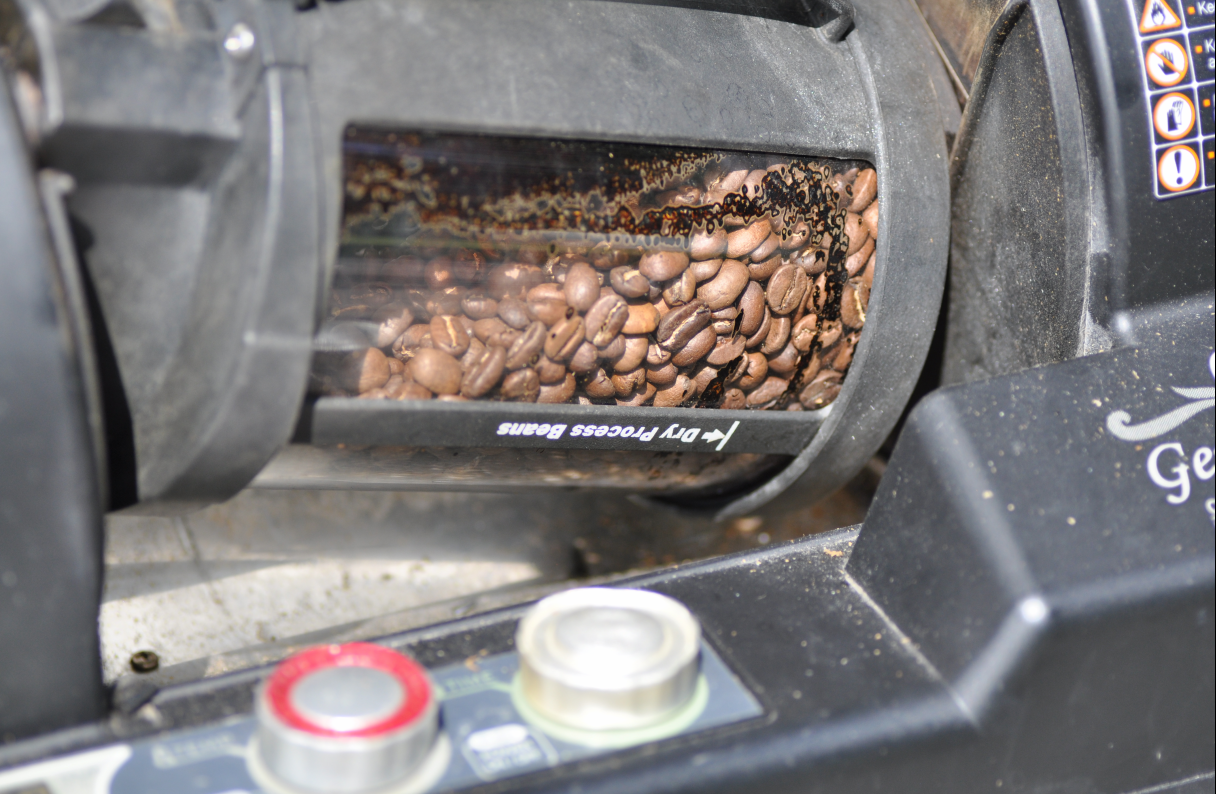
I have since upgraded to a Gene Café CBR-101e, a drum roaster with a rotating, perforated glass drum and forced hot air blowing through it. It is not perfect, but still better than the oven. It only roasts about 200g at a time, which is a little too little to be honest. The adjustable knobs are just for temperature and time, which is a bit coarse. If I roast for 16.5 minutes, then it will heat for 16.5 minutes, no matter what the actual bean temperature or starting temperature is.
So there is room for improvements.
Freshness and storage
Roasted coffee starts losing volatile compounds the moment it leaves the roaster - the aroma compounds evaporate over time, and oxygen turns the oils into stale, cardboard-like flavors.
That doesn't mean that "fresher is better", coffee needs a few days to degas and stabilize after roasting, so I usually wait 3-5 days before brewing a batch. After that, the coffee is at its peak for roughly 2-3 weeks, after which it starts to taste stale.
When I roast bigger batches, I usually store the beans in the freezer until I need them. I always take out the whole batch at once, as moving them in and out of the freezer repeatedly only adds condensation and moisture to the beans, which is a big no-no.
Grinding
If the bean sets the ceiling for how good your coffee can be, the grind decides how much of that you actually manage to get into the cup. This is also the point where I started to understand why people spend hundreds of dollars on something that just crushes seeds.
Really. If you should spend money on anything in your coffee setup, it should be the grinder. A good grinder will give you a consistent grind size, which is the single most important factor for getting a good extraction. A bad grinder will give you a mix of powder and chunks, which makes it impossible to get a balanced cup no matter how well you dial in everything else.
Types of grinders
The whole point of grinding is to get more surface area on the coffee, since water can only dissolve what it can actually reach. Cheap blade grinders just chop the beans randomly, giving you a mix of powder and chunks in the same batch.
Burr grinders instead shear the beans between two hardened surfaces with a fixed gap, which gives a much more even result. Burr grinders come in two flavors, conical and flat.
Blade grinders
Just don't use blade grinders.
Conical burr grinder
A conical burr grinder uses a cone shaped burr rotating inside a ring shaped burr, with the beans fed down through the middle by gravity. It runs fairly slow, around 400-700 RPM, which means less heat but also a slightly wider spread of particle sizes. Less heat means fewer aromatics cooked off before you even brew, and it's noticeably quieter too.
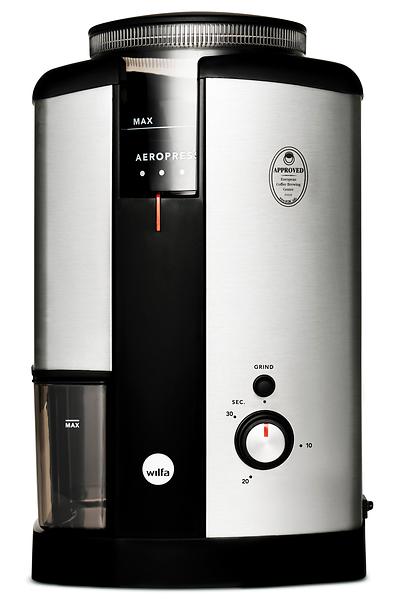
My first burr grinder was a Wilfa Svart Aroma WSG-2, which is a conical burr grinder with 40mm burrs. It is a good entry level grinder.
Flat burr grinder
A flat burr grinder instead uses two parallel, ring shaped burrs facing each other, and the beans get thrown outward by centrifugal force as they get sheared. It spins a lot faster, typically 1000-1500 RPM, and gives a noticeably more even particle size, at the cost of more heat and noise. A more even grind generally means a cleaner cup.
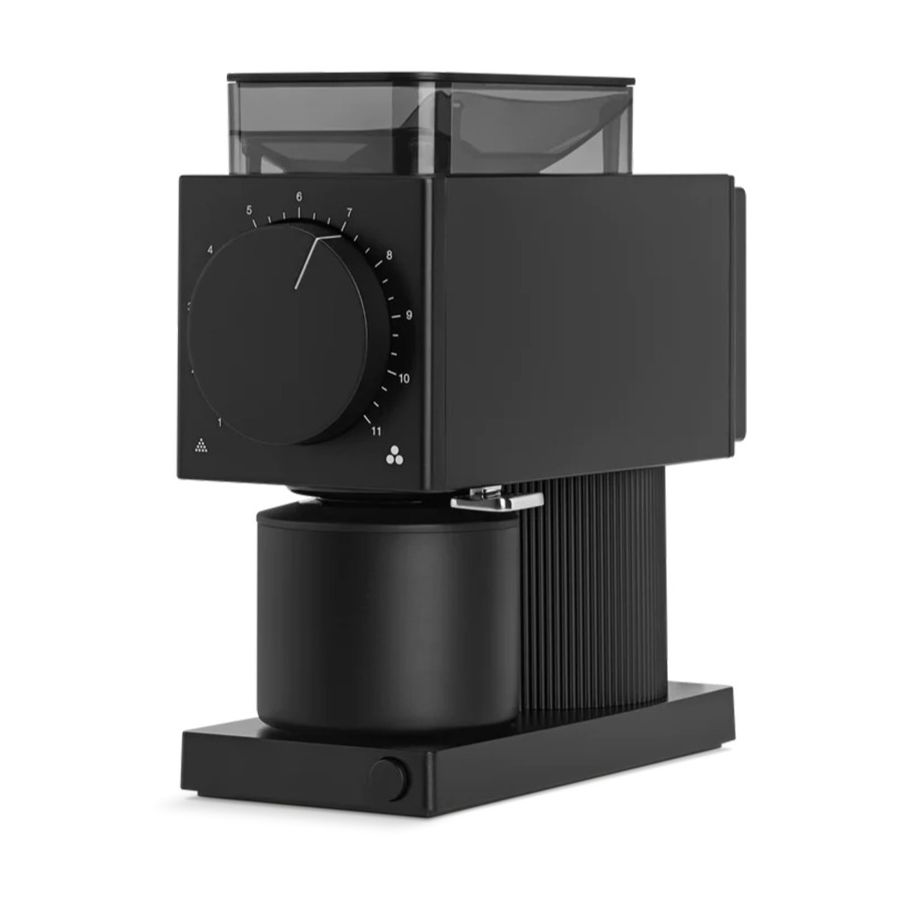
My current grinder is a Fellow Ode gen2, which is a flat burr grinder with 64mm burrs. It is a bit more expensive than the Wilfa, but the difference in the grind is huge.
Burr sizes
Bigger burrs spread the cutting work over more area, so they need less force (and generate less heat) to grind the same amount of coffee, and tend to be more consistent. Home grinders usually sit around 40-50mm, commercial ones can be twice that. My Fellow Ode gen2 has 64mm burrs.
Grind sizes
Grind size decides how much surface area you get and how much resistance the water meets flowing through the bed, and it needs to match how long the water is in contact with the coffee. Grind too fine and the bed clogs, the water sits too long and pulls out the bitter stuff. Grind too coarse and the water rushes through before it can dissolve the good stuff, leaving you with something thin and sour.
Water treatment
Coffee is roughly 98-99% water by weight, so it would be a bit silly if the water itself did not matter. The two properties that matter the most are hardness (calcium and magnesium dissolved in it) and alkalinity (how much it resists changes in pH).
Too soft, and the water can't pull enough flavor out, the cup tastes flat. Too hard, and it can over-extract or taste chalky. Alkalinity buffers against the acids coming out of the coffee, too little and the cup tastes sharp and thin, too much and it flattens the acidity into something bland.
The Specialty Coffee Association's rough target is around 150 ppm total dissolved solids, 17-85 ppm calcium hardness, 40 ppm alkalinity, neutral pH and basically no chlorine.
Since I used to brew beer at home, water treatment is something I already had to learn about there, and I had everything I needed at home to measure and adjust my water for coffee too. Here is a water report for my tap water (I live in Sweden, so it is very soft and low in alkalinity) directly from my own drilled well:
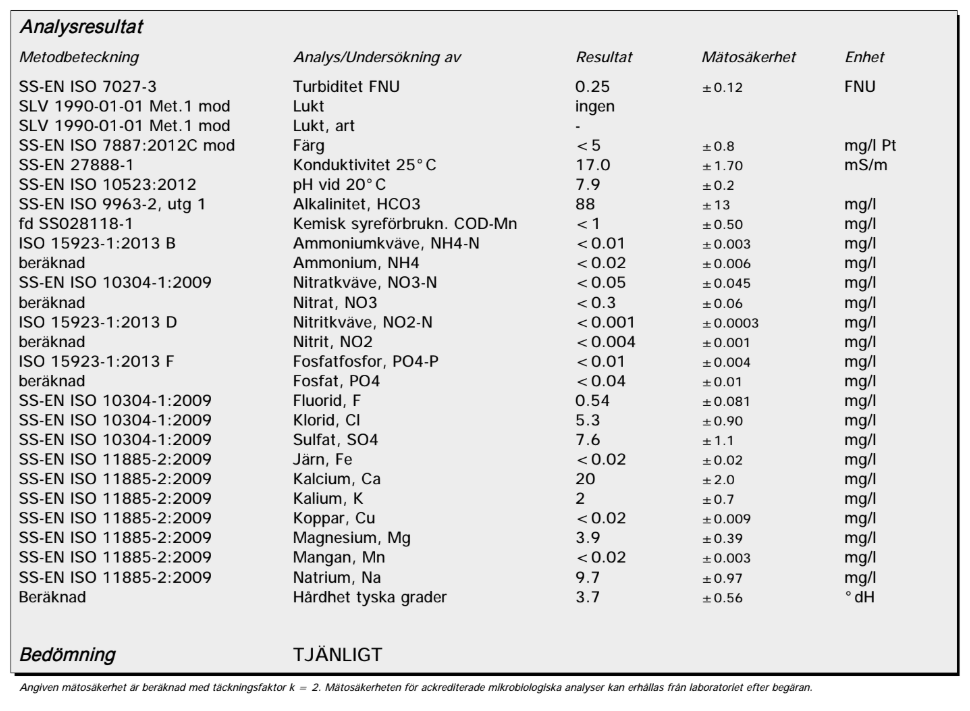
But actually, my water profile is already pretty close to that target, so I don't have to do much. I've tried to add a bit of magnesium (Epsom salt), ~3mg/L of water. It was clearly noticeable in the cup, but not for the better. So for me I'm sticking to the water as it comes out of the tap.
Brewing
This is the part most people actually think of as "making coffee" - pouring hot water over ground beans and waiting.
Brewing methods
Brewing methods split roughly into two groups. Immersion, where the grounds sit fully submerged in a fixed amount of water for the whole brew (French press, cupping), and percolation, where fresh water continuously flows through the coffee bed and out the bottom (pour over, drip machines). The AeroPress is a bit of both.
In immersion, extraction slows down as the water gets closer to saturated. In percolation, the water is constantly refreshed, so extraction happens faster for the same time, but less evenly, since water tends to find the path of least resistance through the bed (channeling).
Filters
Filters are also a thing, and they come in three main types: paper, metal and cloth. Each has its own characteristics and will affect the cup differently.
To be honest, I've never used cloth filters, so I can't really comment on them, but I have tested a lot of different paper filters. The only metal filter I have used is for my French press, which is a very different (immersion) brewing method, so I'm not sure how it would compare to a paper filter in a pour over brewer. So.. after all, the only filter I have used for percolation brewing is paper :-)
Anyway, paper filters are the most common, and they come in bleached (white) and unbleached (brown) versions. My experience is that the unbleached paper can carry a papery taste into the cup unless it is rinsed properly with hot water before brewing. Bleached paper has it too, so I always rinse my filters anyway, but it is far less noticeable with bleached paper.
I had a period where I tested all different filters and brands that I could find, and it really makes a difference. The thickness of the paper, the shape of the filter and the pore size all affect how fast the water flows through the bed, how many fines get through into the cup and how much coffee oils are absorbed by the filter. All of these things affect the cup in different ways.
For example, Chemex filters are noticeably thicker than any standard filter, roughly 20-30% heavier per sheet, which is a big part of why Chemex coffee comes out so clean and tea-like.
I don't have much to say about cloth filters, but they should let more oil through than paper, and catch more fines than metal.
Brew ratio
The brew ratio is simply how much coffee you use relative to how much water, usually written like 1:16, meaning 1 gram of coffee to 16 grams of water.
I don't like the x:y notation, I use 15g of coffee for 250g of water, which is also what one cup of coffee is in my mind. Two cups become 30g of coffee for 500g of water, and so on. The ratio is the same, but the numbers are easier to work with in my head instead of having to do mental division to figure out how much coffee I need for a given amount of water.
Blooming
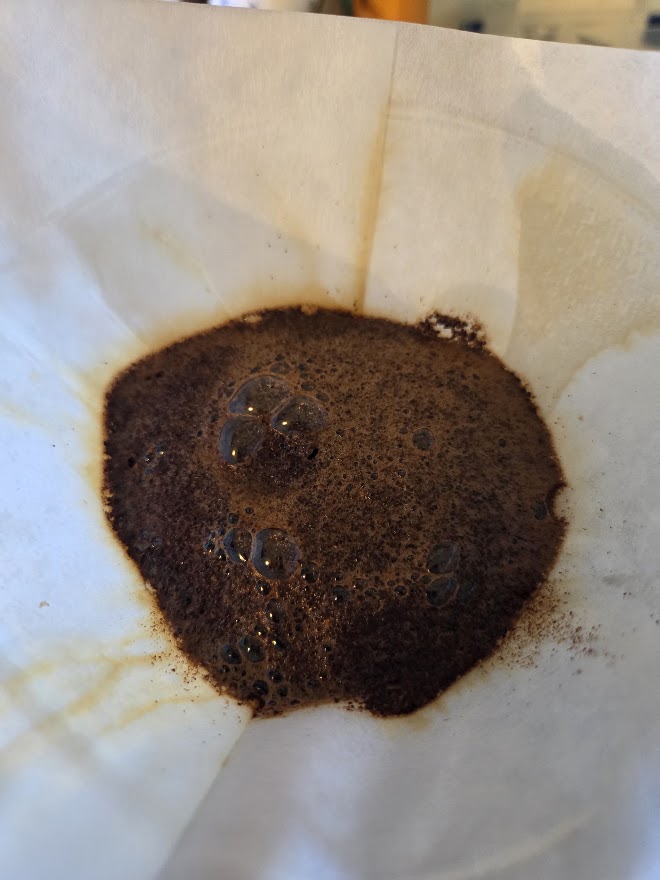
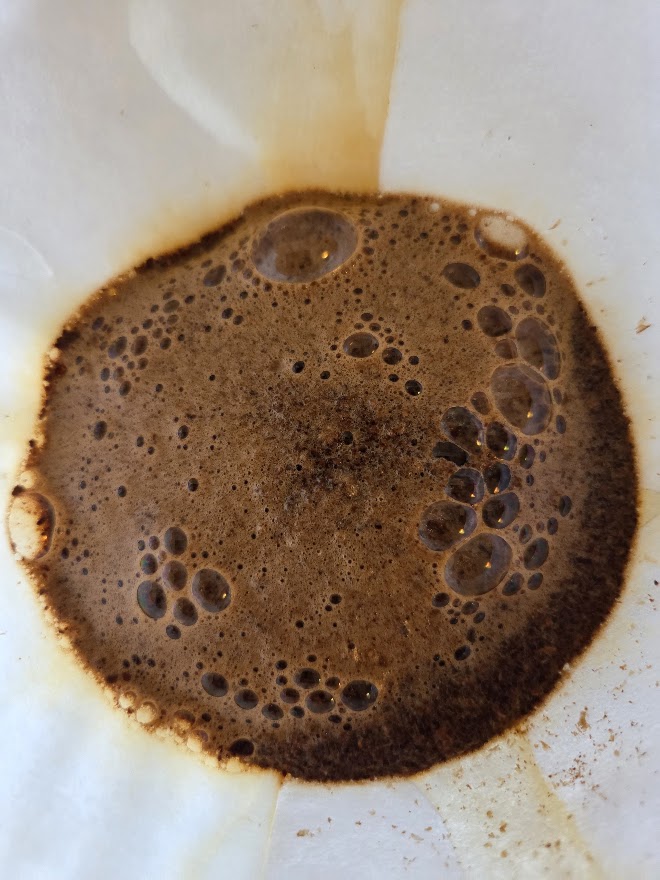
Freshly roasted coffee still has a lot of CO2 trapped inside it from the roasting process. It could be as much as 2-10 ml of gas per gram of coffee if it is only a few days old.
As soon as hot water hits the grounds, that gas comes bubbling out (degassing), which is why you pour a small amount of water first, roughly twice the coffee's weight, and let it sit for 30-45 seconds before continuing. This is called blooming.
Look how all that CO2 comes out as bubbles, it is from a freshly roasted batch of coffee in my Chemex brewer:
Extraction
Extraction is where all the previous sections come together, for better or worse. It's simply the process of dissolving stuff out of the ground coffee and into the water.
Not everything dissolves at the same speed. Acids and salts go first, then sugars, and last (and slowest) the bitter, roast-derived brown compounds. That's exactly why under-extracted coffee tastes sour (mostly acids) and over-extracted coffee tastes bitter (acids and sugars long gone, the bitter stuff now dominating).
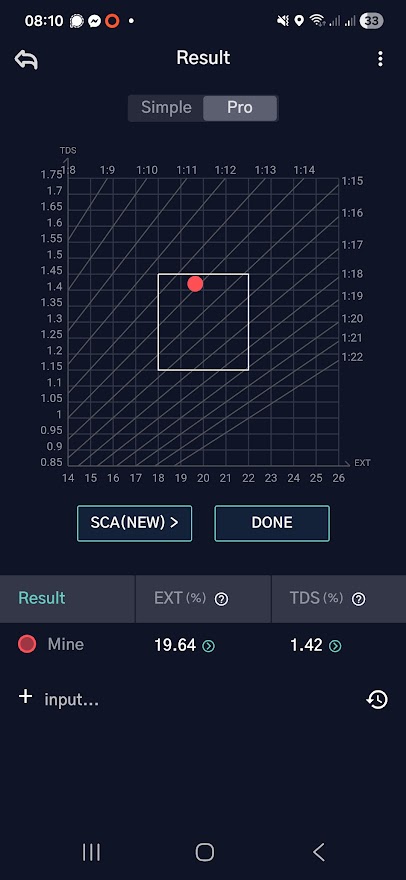
The generally accepted target, popularized by the SCA's brewing control chart, is an extraction yield of 18-22%, at a brew strength of 1.15-1.45% TDS for filter coffee. Extraction yield is simply:
EY (%) = (TDS (%) x brewed coffee mass (g)) / dry coffee mass (g)
Below 18% and the cup tastes under-extracted and sour, above 22% and it tastes over-extracted and bitter. I tend to like mine towards the lower end of that window.
Roast level
A darker roast is more porous since more CO2 and moisture is already driven off, so water gets into it faster and extracts quicker than a light roast at the same grind size. In practice a dark roast usually wants a coarser grind or shorter brew time to land in the same window.
Water temperature
Too hot, and you push the slow, bitter stuff out faster than you'd like, ending up over-extracted. Too cold, and even the good stuff, acids and sugars, doesn't have time to come out properly. The usual recommendation is 90-96 degrees Celsius, just under boiling.
Time
Brew time and grind size are basically two sides of the same coin. A finer grind reaches the same extraction yield faster than a coarser one. For pour over I aim for somewhere around 4-5 minutes total, and if I land outside that window I already know my grind size or pour was off.
Measurements
I'm an engineer. I like numbers.
Refractometer
A refractometer measures how much light bends when it passes from air into the brewed coffee (its refractive index). Dissolved solids bend the light more, in a pretty linear and predictable way, so that measurement can be converted into total dissolved solids (TDS) using a calibration curve made specifically for coffee.
Coffee doesn't refract light quite the same way as, say, sugar water, so a generic Brix refractometer would give you the wrong number. In other words, the refractometer I use for beer doesn't work here.
DiFluid r2
I ended up buying a DiFluid R2, a small handheld refractometer built specifically for coffee. It uses the exact same principle as above, just with a temperature-compensated sensor and coffee calibration built in, so it just gives you a TDS number directly instead of a raw refractive index you'd have to look up in a table.
My setup
I have a few brewers.
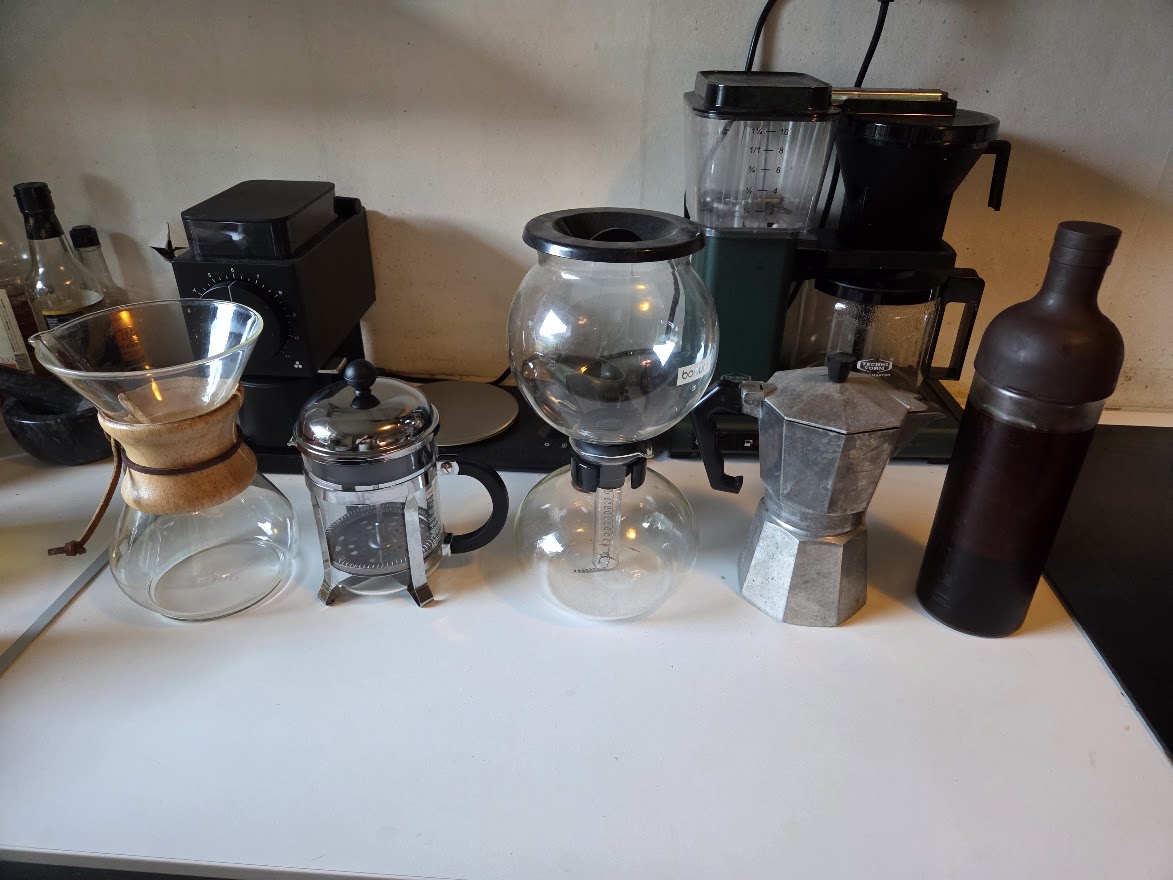
From left to right:
- Chemex - Percolation - pour over brewer with a thick paper filter that gives a very clean cup, but is a bit slow to brew and requires a lot of attention to pouring technique. It is my main brewer that I use on daily basis.
- French press - an immersion brewer that gives a heavier, more full-bodied cup, but is a bit more forgiving on technique. As it does not have a paper filter, it lets more oils and fines through, which is why the cup is heavier.
- Bodum Pebo - a vacuum (siphon) immersion brewer that uses a vacuum to pull the water through the coffee bed. Unfortunately, I haven't used it since I got an induction stove.
- Mocca pot - a stovetop brewer that uses steam pressure to push water through the coffee bed. Same here, it does not work on my induction stove, so I haven't used it in a while.
- Cold brew - a very slow immersion method that takes 12-24 hours to brew, but gives a very smooth, low acidity cup.
- Moccamaster - Percolation - Batch brewer. The only drip coffee maker I have found that actually makes good coffee.
My coffee procedure
I'm going to make two cups of coffee (500g water, 30g coffee) in my Chemex, and measure the TDS and extraction yield of the cup.
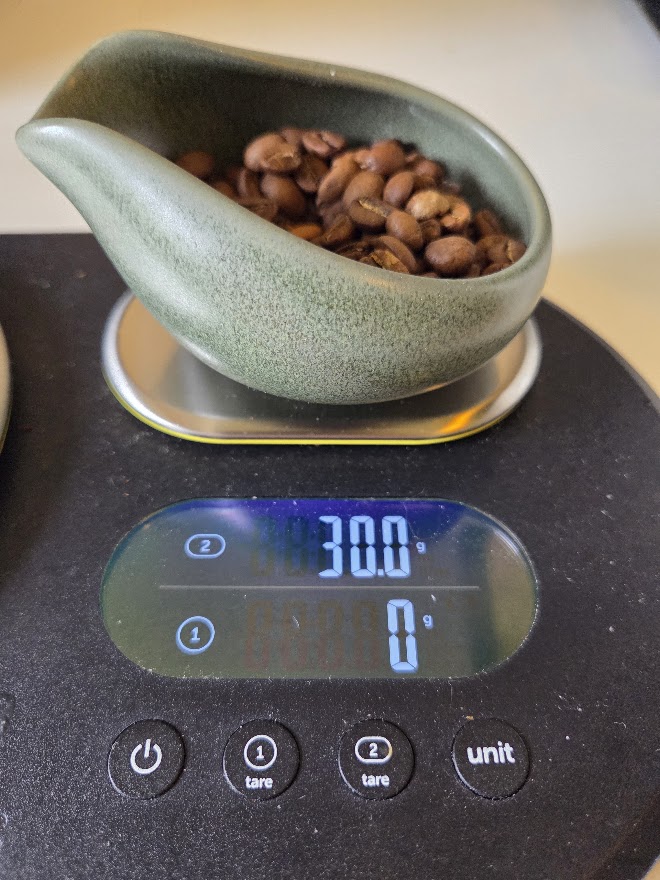
Measure coffee beans
Measure 30g of coffee beans.
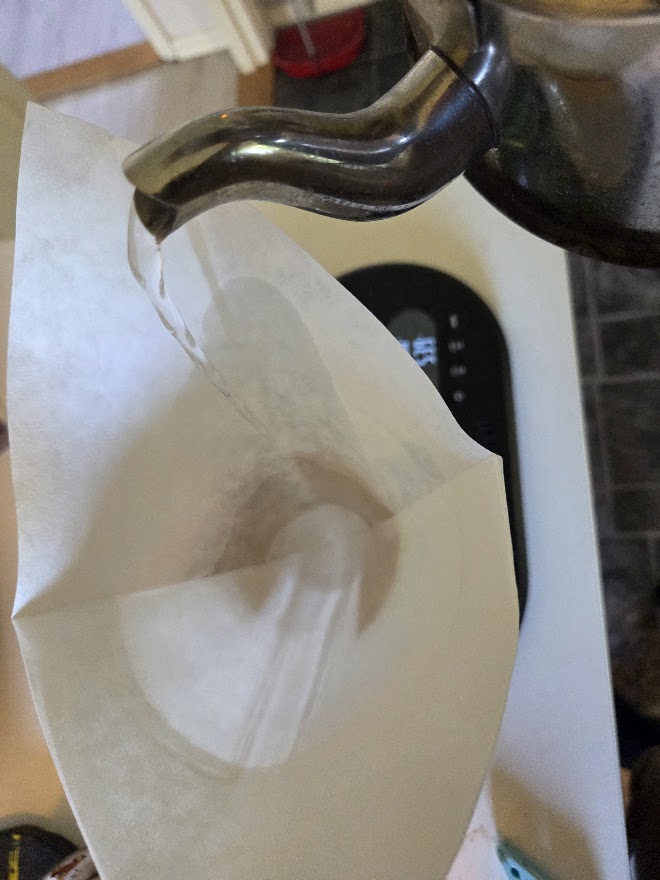
Wet coffee filter
Even though the Chemex filter is bleached, I still rinse it with hot water to get rid of any papery taste and preheat the brewer. The water is discarded before adding the coffee.
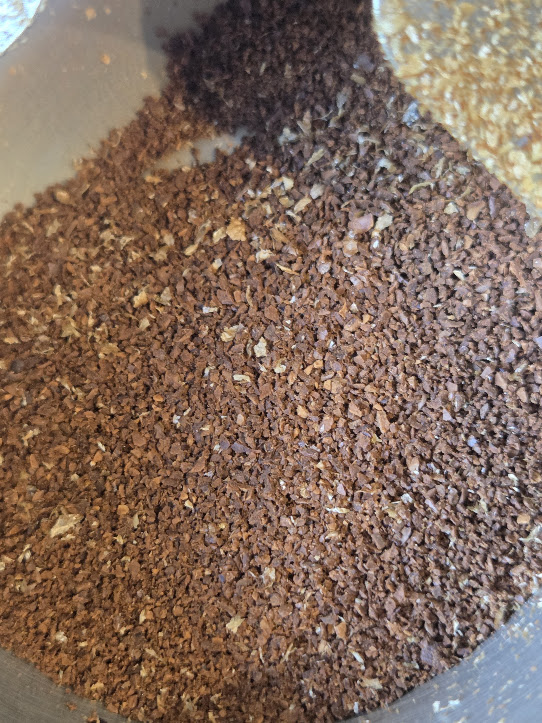
Grinding
This time I have set the grinder to "grind size 16", which should be a particle size of about 717um.
Bloom
Blooming is important. This coffee was roasted 3 days ago, so it still has a lot of CO2 trapped inside it. I pour 60g of water over the grounds and let it sit for 30 seconds to let the gas escape before continuing.
Pour
I pour the 200g water in a slow, circular motion to keep the bed of coffee evenly saturated. Then I wait for the water to drain through the bed before pouring the last 240g of water in the same slow, circular motion.
The total brew time is 4 minutes and 30 seconds.
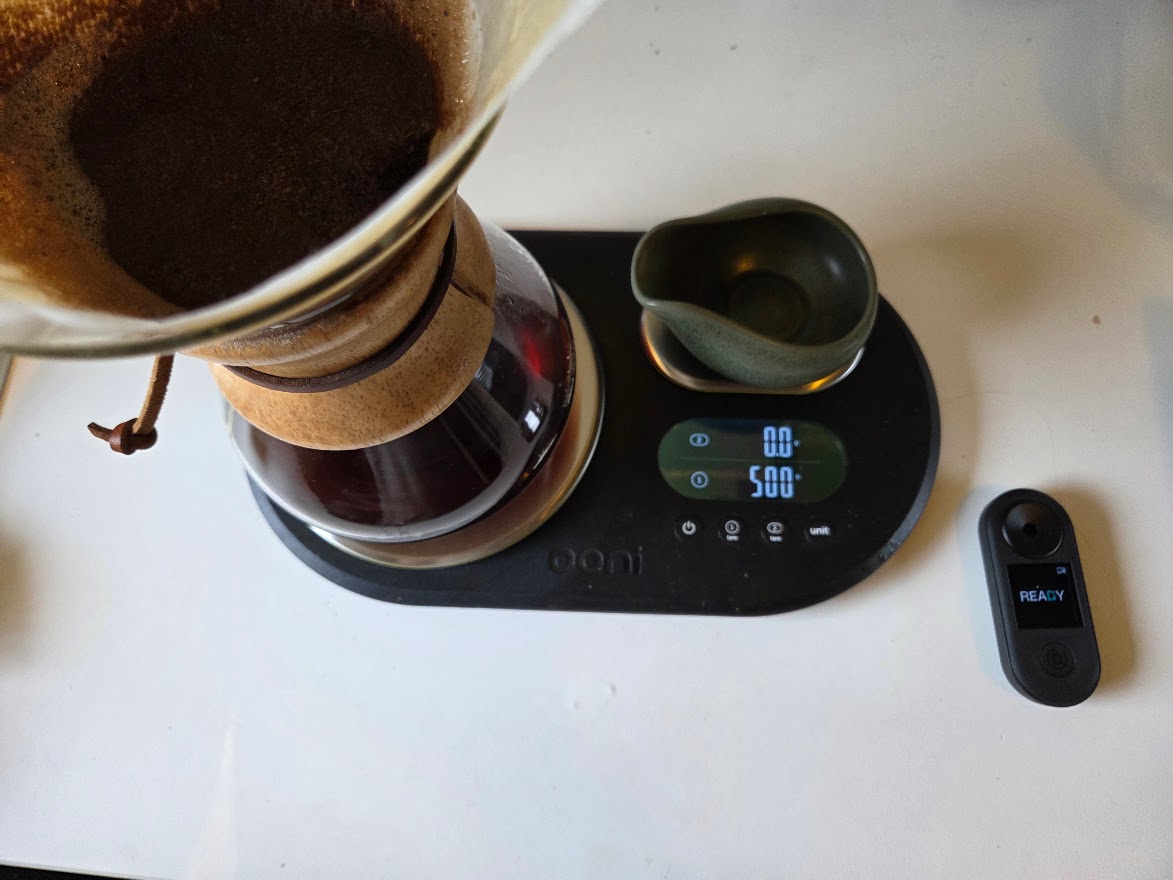
Measure
Take a sample of the brewed coffee and measure the TDS with the DiFluid R2 refractometer.
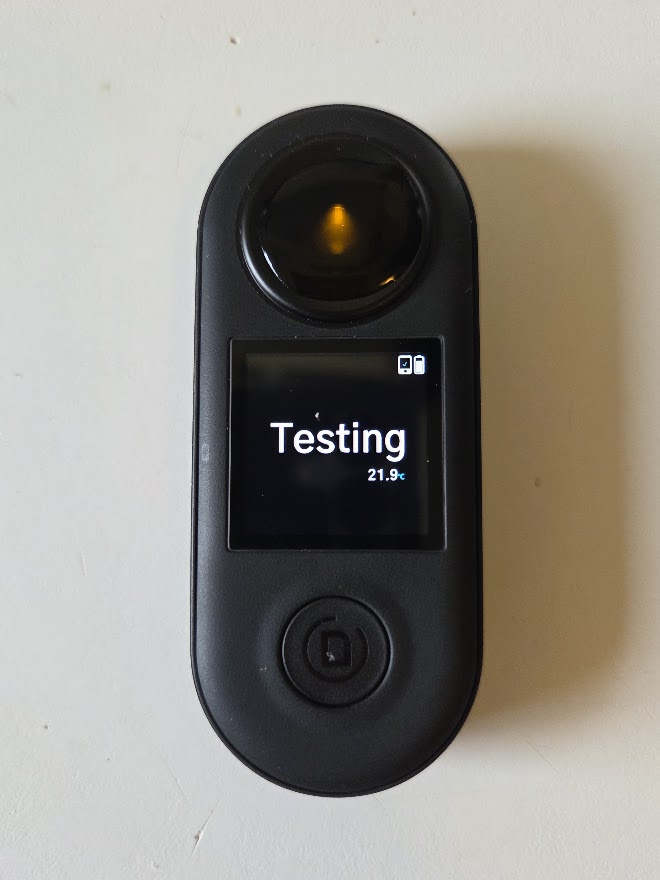
It reads 1.42% TDS, which gives an extraction yield of 19.64%, right in the middle of the SCA's recommended range.
Enjoy
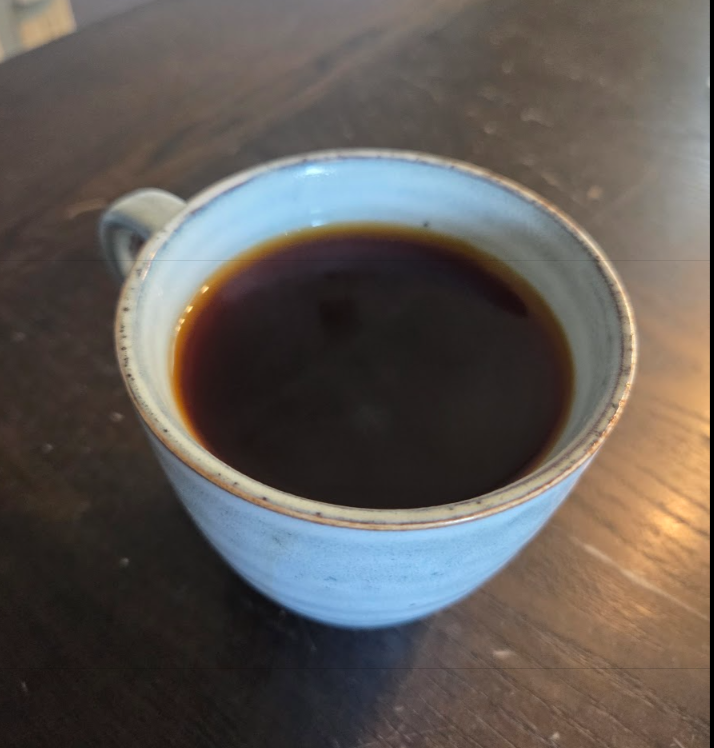
The coffee is served, enjoy!
Conclusion
So, is it hard to make a good cup of coffee?
No, it isn't. Taste is a subjective thing, so all those methods and numbers are more of a fun way to explore the beverage rather than how to make the "best" cup of coffee ever made. Honestly, my coffee preference has changed a lot over recent years, and I find it hard to believe that I would have appreciated the coffee I drink now two years ago.
The coffee I brew nowadays is far more sour and sweet. With that said, I'm not sure that my guests would agree with me that my coffee is the best they have ever had, but whatever.
It all boils down to doing what you like, and if you like it, then it is good coffee.
Further reading
James Hoffmann [3] has a lot of good videos on coffee, and I recommend checking out his channel on YouTube.
He has also written books on the subject. "How to Make the Best Coffee at Home" [4], is a good read if you want to dive deeper into the subject.
I've ordered his second book, "The World Atlas of Coffee" [5], but I haven't read it yet.
References
| [1] | https://www.instagram.com/p/DbJQRnUuVhk/ |
| [2] | (1, 2) https://www.instagram.com/gardsrosteriet/ |
| [3] | https://www.youtube.com/@jameshoffmann |
| [4] | https://www.amazon.se/How-Make-Best-Coffee-Home/dp/1784727245/ref=asc_df_1784727245 |
| [5] | https://www.amazon.se/World-Atlas-Coffee-3rd-explained/dp/1784729868/ |